Jupyter notebook is a very nice tool to analysis data using python. In this tutorial, we will use some steps to show python beginners how to install it and run python script.
Install jupyter notebook
There are two ways to install jupyter notebook.
Use pip command to install.
pip install jupyter
or install anaconda, which will also install jupyter notebook on your computer.
This tutorial illustrates how to install anaconda.
Install and Use Both Python 2 and Python 3 in Windows with Anaconda
Run jupyter notebook
After having installed jupyter notebook, you can run it.
jupyter notebook
Then you will find this result.

Then you can use browser to open jupyter notebook with url: http://localhost:8888/

While we have installed jupyter notebook, we can edit and run python script with it. To run a python script, we can do following steps below.
Create a new jupyter notebook
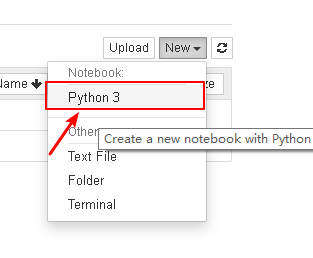
To run python script, we should create a new notebook first.

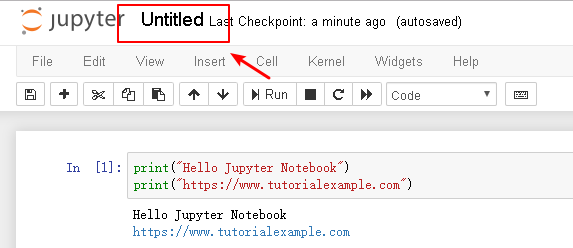
Then you can add some python script in this notebook.
Add python script in notebook and run it
To run python script, we add some python code and run it like below.

You will find the result appears.
After having run the python script, we can save it and restore in future.
Save checkpoint
Each checkpoint saved the past status and result of python script, we can save current python result and code, then restore it in future.

Rename notebook
The default name of notebook is Untitled, we can rename it.

Then enter a new name.

Rename it.

You will find this notebook is renamed successfully.
