Tippy.js is a powerful javascript library to create tooltip for web development. The default style of the tooltip likes:

You can create a customized tooltip theme for your web application. In this tutorial, we will introduce you how to do.
Preliminary
You should import tippy.js first.
<script src="https://unpkg.com/@popperjs/core@2/dist/umd/popper.min.js"></script>
<script src="https://unpkg.com/tippy.js@6/dist/tippy-bundle.umd.js"></script>
Create a customized theme for tooltip
The basic structure of tooltip theme must be:
<div data-tippy-root style="display:none;">
  <div class="tippy-box" data-placement="top">
    <div class="tippy-content">
    </div>
  </div>
</div>
We can set the style of tippy-box with css.
Set the style of your customized tooltip theme
In this tutorial, we only change the background and font color of tooltip, you can set the style as follow:
.tippy-box[data-theme~='te'] {
  background-color: tomato;
  color: #ffffff;
}
.tippy-box[data-theme~='te'][data-placement^='top'] > .tippy-arrow::before {
  border-top-color: tomato;
}
.tippy-box[data-theme~='te'][data-placement^='bottom'] > .tippy-arrow::before {
  border-bottom-color: tomato;
}
.tippy-box[data-theme~='te'][data-placement^='left'] > .tippy-arrow::before {
  border-left-color: tomato;
}
.tippy-box[data-theme~='te'][data-placement^='right'] > .tippy-arrow::before {
  border-right-color: tomato;
}
Notice: here we named our customized tooltip theme as: te
Bind our customized tooltip theme on a html element
We can create a html button and bind our customized tooltip on it.
Create a html button
<div id="wrap">
	<button id="myButton_1">Button One</button>
</div>
Bind our customized tooltip theme
<script type="text/javascript">
tippy('#myButton_1', {
  content: "This is a customized tippy.js theme!",
  theme: 'te'
});
</script>
Where content is our tooltip message, theme is the name of our customized theme (te).
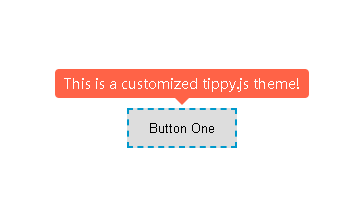
Then you will see the effect:
